In this post, I’m going to show you exactly how to reduce form abandonment for your lead capture forms.
So you can easily generate more leads from your website, landing pages and funnels.
And about half way through, I even include a form optimization tracker which you can grab free!
Ready? Let’s get started!
Contents:
- Why reduce form abandonment
- Three ways to track your form conversion rates
- How to reduce form abandonment with Step Based Metrics
- Optimizing Your Form With A/B Testing
- Bonus: Optimization Ideas to Reduce Form Abandonment
If you’re a LeadForms customer then you can jump right down to the section about How to reduce form abandonment with LeadForms.
Note: If you’re looking for an easy way to build and optimize high converting lead capture forms then check out LeadForms. You can grab your free trial here.
Why Reduce Form Abandonment?
Web form abandonment is a major problem that’s costing many businesses leads.
This is also where there’s an opportunity!
For example, imagine you determine that your form conversion rate is 2%, meaning that 98% of prospects abandon your form.
With some simple tweaks, you take your form conversion rate up to 5%.
That’s a 150% increase in leads!
Without having to spend additional money on advertising.
Simply by optimizing your lead capture forms.

So where do you start?
The first step to reducing form abandonment is to use better forms.
I’m just going to say it… most lead forms aren’t that great to begin with.
Ordinary forms are boring and hard to find — usually buried on a contact us page somewhere.
And they aren’t built to convert.
For example — do you think more people really want to put their personal details into a form that looks like this?
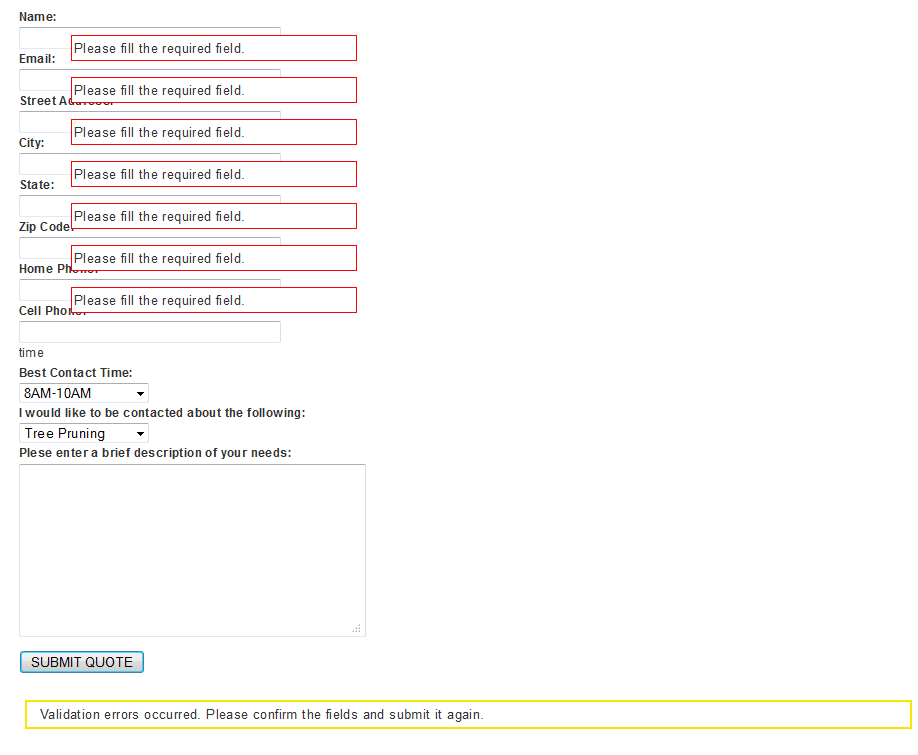
Probably not.
What about a form that looks like this?
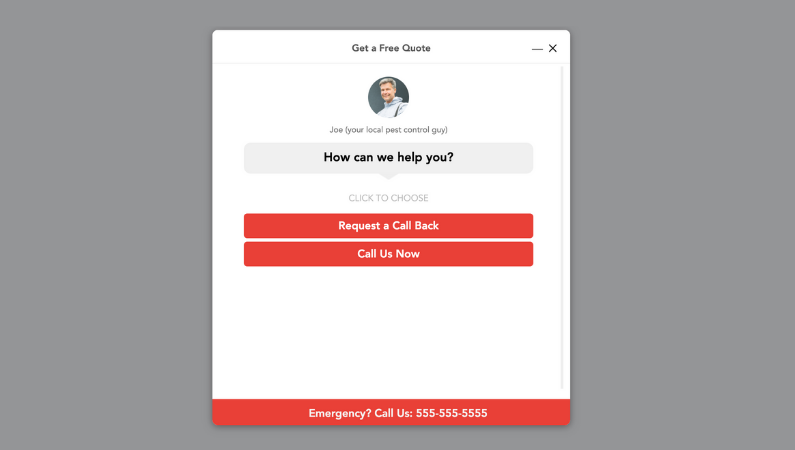
Much better!
This type of form is way better — this second option is an example of a LeadForm and it wins every time.
Now, you don’t have to use LeadForms to get better lead forms. You can optimize any form for conversions with a little work. However, if you’d like to skip all of the hard work and get a lead form that’s optimized for conversions right out of the box, then here’s a template to help you get started.
After you get your form setup. The next step is to start tracking your form conversion rates.
Form Abandonment Tracking: 3 Ways to Track Your Form Conversion Rates
Do you know your contact form conversion rate?
Knowing this number gives you a benchmark to work from.
So with that said, the first step to reducing your form abandonment rate is to track your form conversion rate. This will allow you to do a few things:
- Establish a form conversion rate benchmark
- Know what’s causing the biggest drop-off in your form
- Determine what to optimize — here’s a copy of our free form CRO tracker to help
Note: When talking about tracking form conversion rates I’m talking in the context of conversion rate optimization, not measuring marketing attribution (i.e, where your leads are coming from).
With that said, here are three of the main ways to track your form conversion rates:
Option #1: Form abandonment tracking in Google Analytics
This is the most basic way to track your form conversion rates.
With this method, you’ll want to redirect all form submissions to a page that’s hosted on a separate “thank you” or “success” page.
Like this (here’s a thank you page from Hubspot).

For example, your form might live on a page like:
https://yourdomain.com/landing-page
And the thank you page might be on a page like:
https://yourdomain.com/success
When someone submits your form, it will simply redirect them to the success page.
But you can’t stop there.
You’ll also need to fire a conversion pixel if you want to see the conversion rates inside of Google Analytics.
For example, let’s say that it’s Google Analytics. If you’re using a separate thank you page, then you’ll more than likely want to set a “destination goal” in GA. You can follow the steps here to set up goals inside of Google Analytics.
How to find your form conversion rate in Google Analytics:
After you set up the goal and have the conversion event firing on your thank you page, you can find the goal conversion rate of your form (or landing page) inside of Google Analytics.
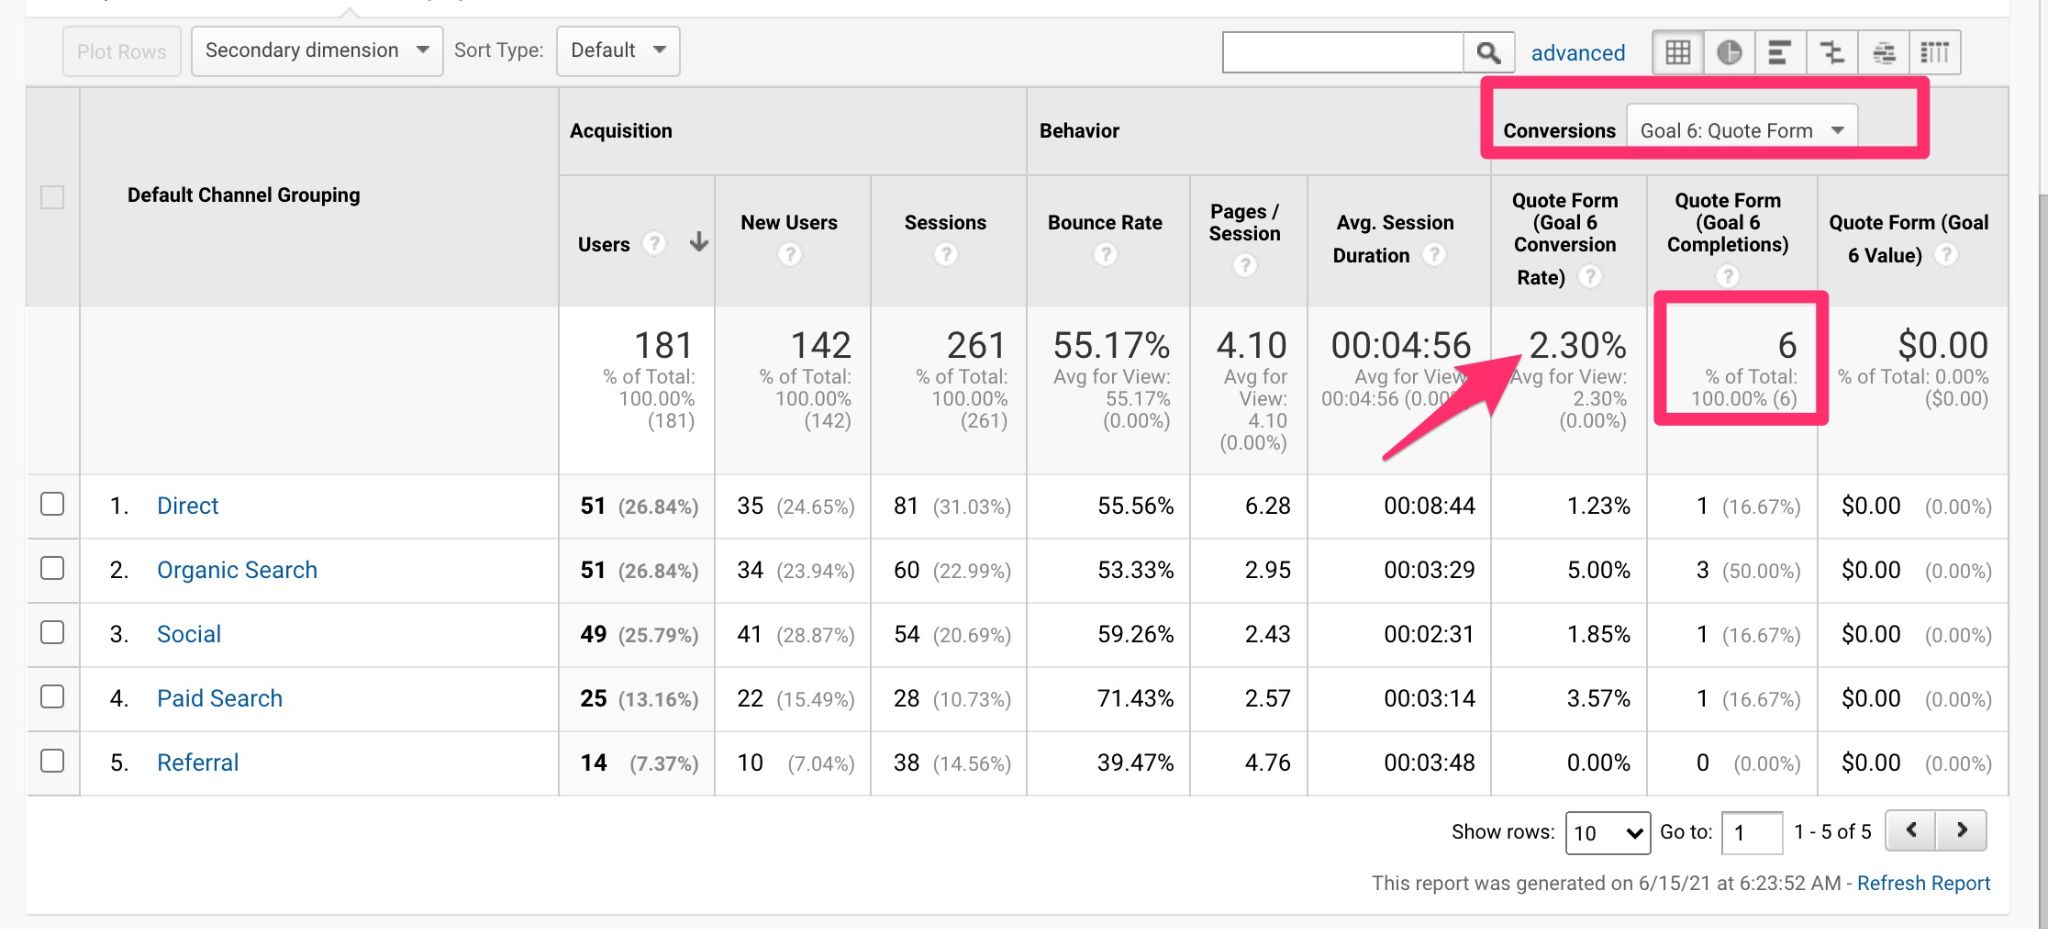
One simple way to see your form conversion rate is to follow the steps below:
- Go to “Acquisition”
- Select “Channels”
- Choose your date range
- Select your conversion goal from the drop down
- Look at the column labeled {Goal Name (Goal Conversion Rate)}. In this case I can see that the form has a 2.3% conversion rate. This is the benchmark to work from
This method not only helps with marketing attribution, but it also provides you with basic insight into your overall form conversion rate.
If you’re using LeadForms, then you can set this all up in one simple step with our Google Analytics Integration.
When it comes to web form conversion tracking of more sophisticated multi step forms, you might need to have a more complex setup with event tracking.
Option #2: Using Google Analytics & Google Tag Manager
Form abandonment tracking in Google Tag Manager is a more advanced way to track your form completions.
The benefit to tracking form completions with Tag Manager is that you can use event tracking to capture the conversion and keep the prospect on the same page.
The downside is that this is a bit more complicated and time consuming to set up.
First, you need to set up event based goals inside of Google Analytics.
Then you need to set up tags and triggers inside of Google Tag Manager to fire the conversion events when someone submits your form.
Since this post isn’t about Tag Manager, I’m not going to dive deeper into this method. To see exactly how to track form abandonment with Google Tag Manager you can read more here.
Option #3: Using Form Analytics Software
The third (and recommended) option is to use existing form analytics software to track, measure, and optimize the conversion rates of your forms.
In the section below, I’ll show you how to do this using LeadForms. If you don’t have an account, you can grab a free trial here.
How to Reduce Form Abandonment and Increase Form Conversion Rates with Step Based Metrics
The prerequisite here is that you’ll need to have a form setup with LeadForms to leverage our online form conversion tracking features.
Here are some templates for inspiration.
LeadForms not only makes creating multi step lead forms easier, but our software also makes it easier to track and optimize your forms without having to do any complex analysis or setup in Tag Manager.
When it comes to tracking your form abandonment rate, there are two key metrics that you’ll want to pay attention to.
- The drop-off rate of each step in your form.
- Duration time — how long it takes someone to complete a step in your form.
Let’s look at how to optimize an existing form for a pest control company.
The Lead Form:
For context, here’s what the form looks like.

This is an example of an interactive form built with LeadForms. Here are some more multi step form examples for your inspiration.
As you’ll see in the image below, this form has multiple steps to help qualify the lead.
Let’s jump over to the LeadForms Builder. Here’s the flow of the form:
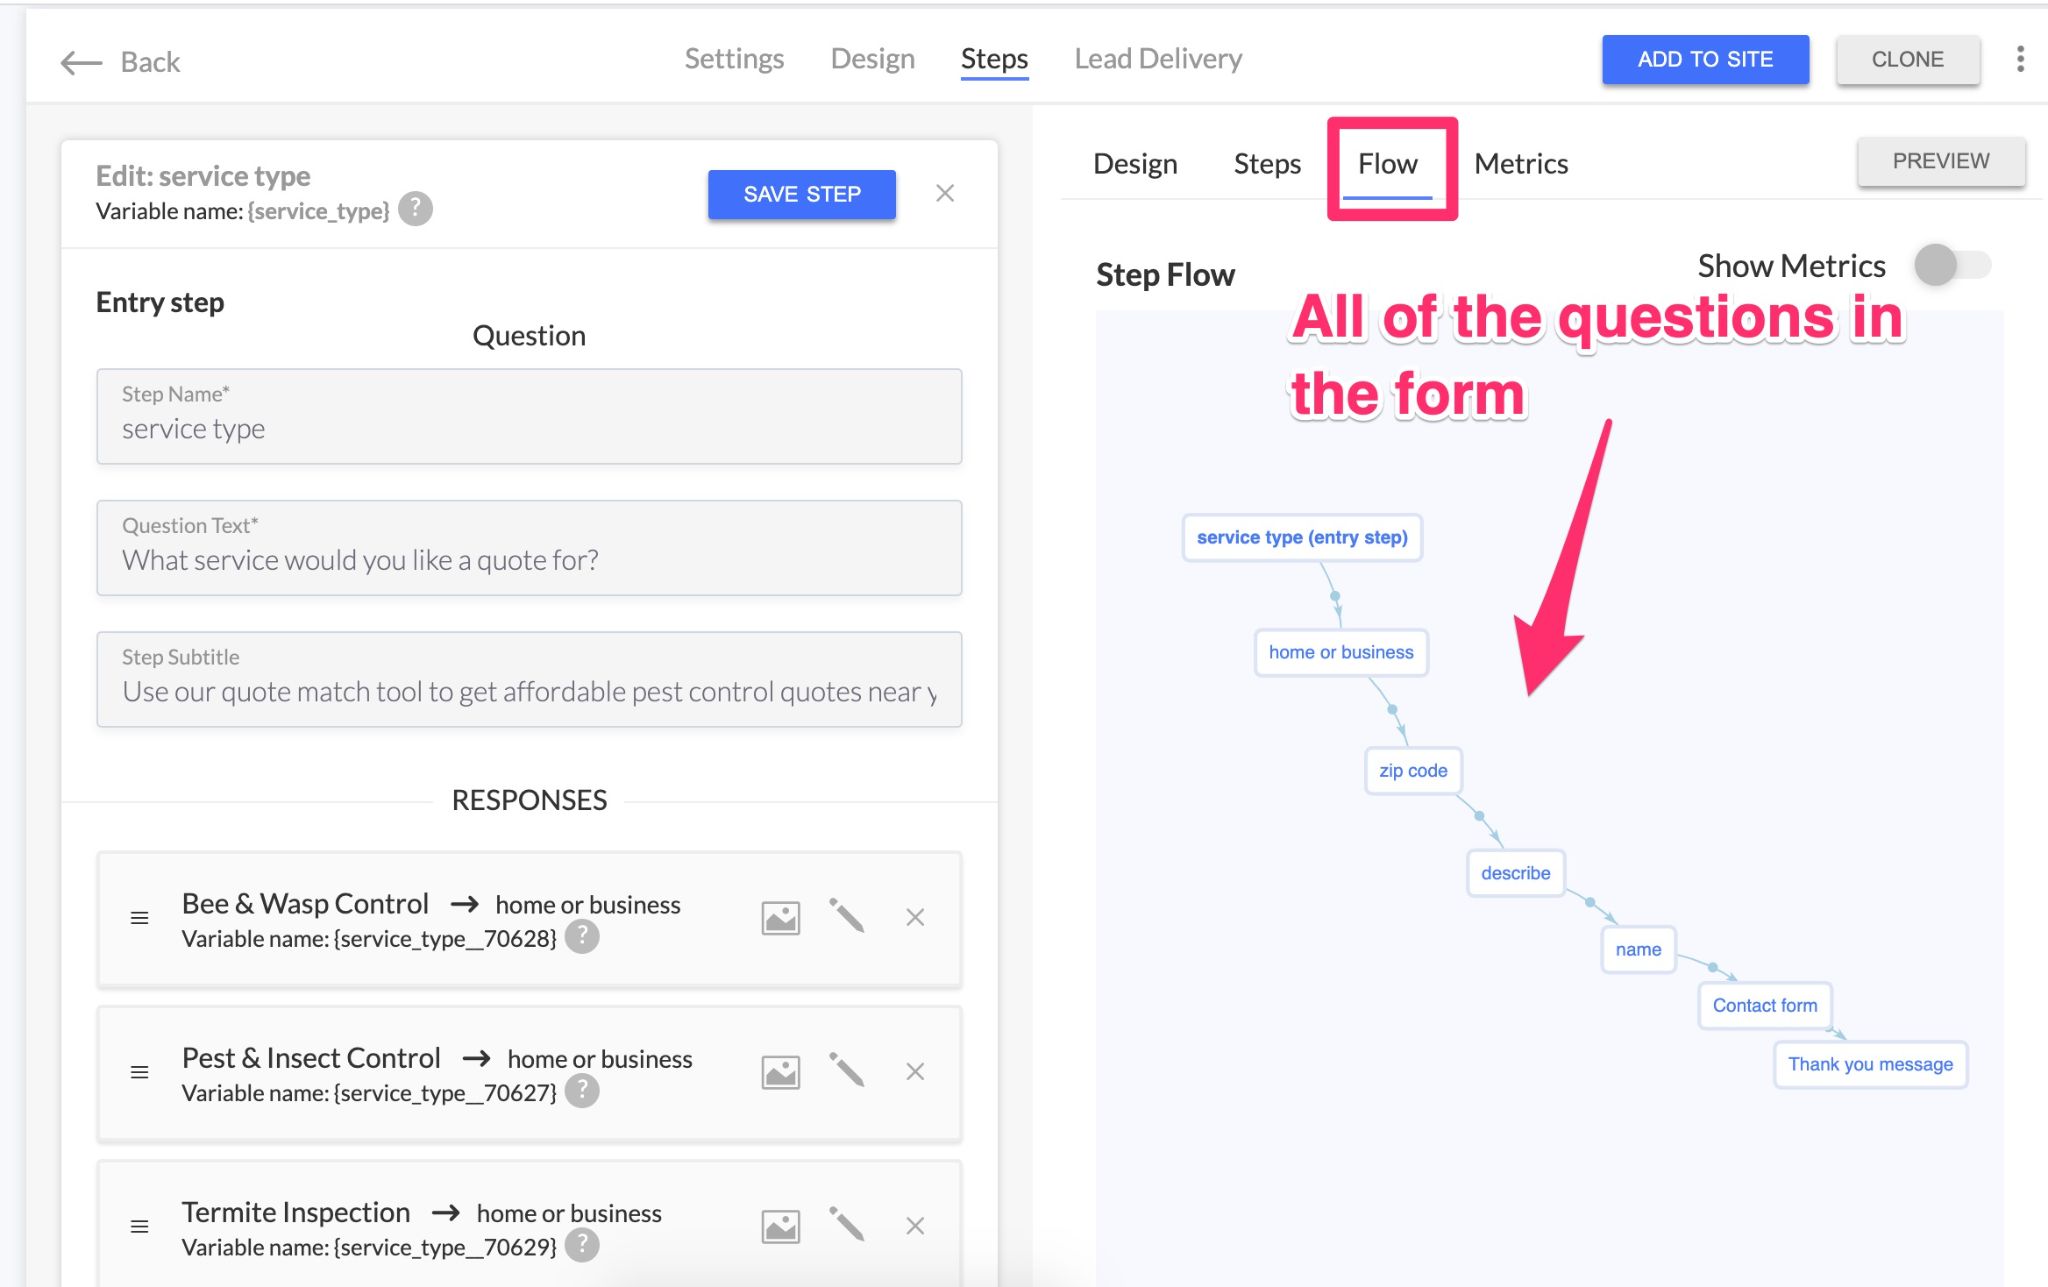
Each tiny block represents a step/question. So for example, the form asks for the following information:
- What type of service are you looking for?
- Is this for your home or business?
- What’s your zip code
- Describe your issue
- What’s your name
- Contact details
As you can imagine, tracking the conversion rate of each step of the form like this using Google Tag Manager can be a challenge to set up.
That’s why we built the Step Based Metrics feature for LeadForms.
Before we drill down into each step, let’s back up and look at the overall conversion rate of this form:
Just looking at the form’s top-level metrics, this LeadForm has about a 5% form conversion rate
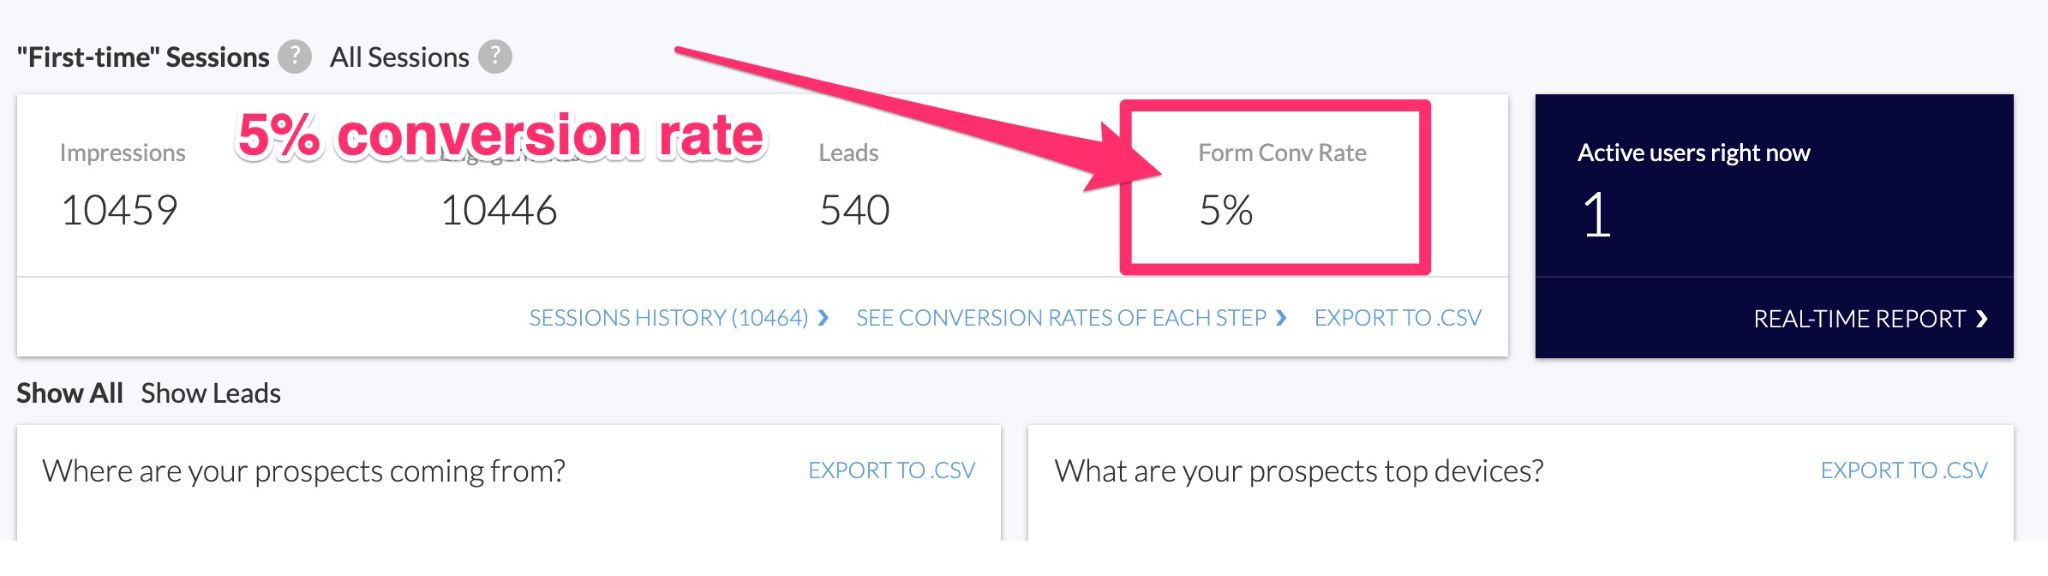
Not bad…
Many marketers will accept a 5% form conversion rate and call it a day, focusing on squeezing more traffic through the funnel — which is certainly an option.
But I’m all about optimizing first.
Even a slight bump in the conversion rate of this form can dramatically impact down funnel leads and revenue.
So here’s the BIG question…
Which question (or step) in this form is causing the biggest drop-off?
To understand this, we need to drill down into the form and look at some more granular metrics.
Viewing the step-based metrics:
The first step to tracking the form conversion rate is to access the step-based metrics.
To do that, simply open up the Leadform and click on the “Metrics” link in the right hand side of the form builder:
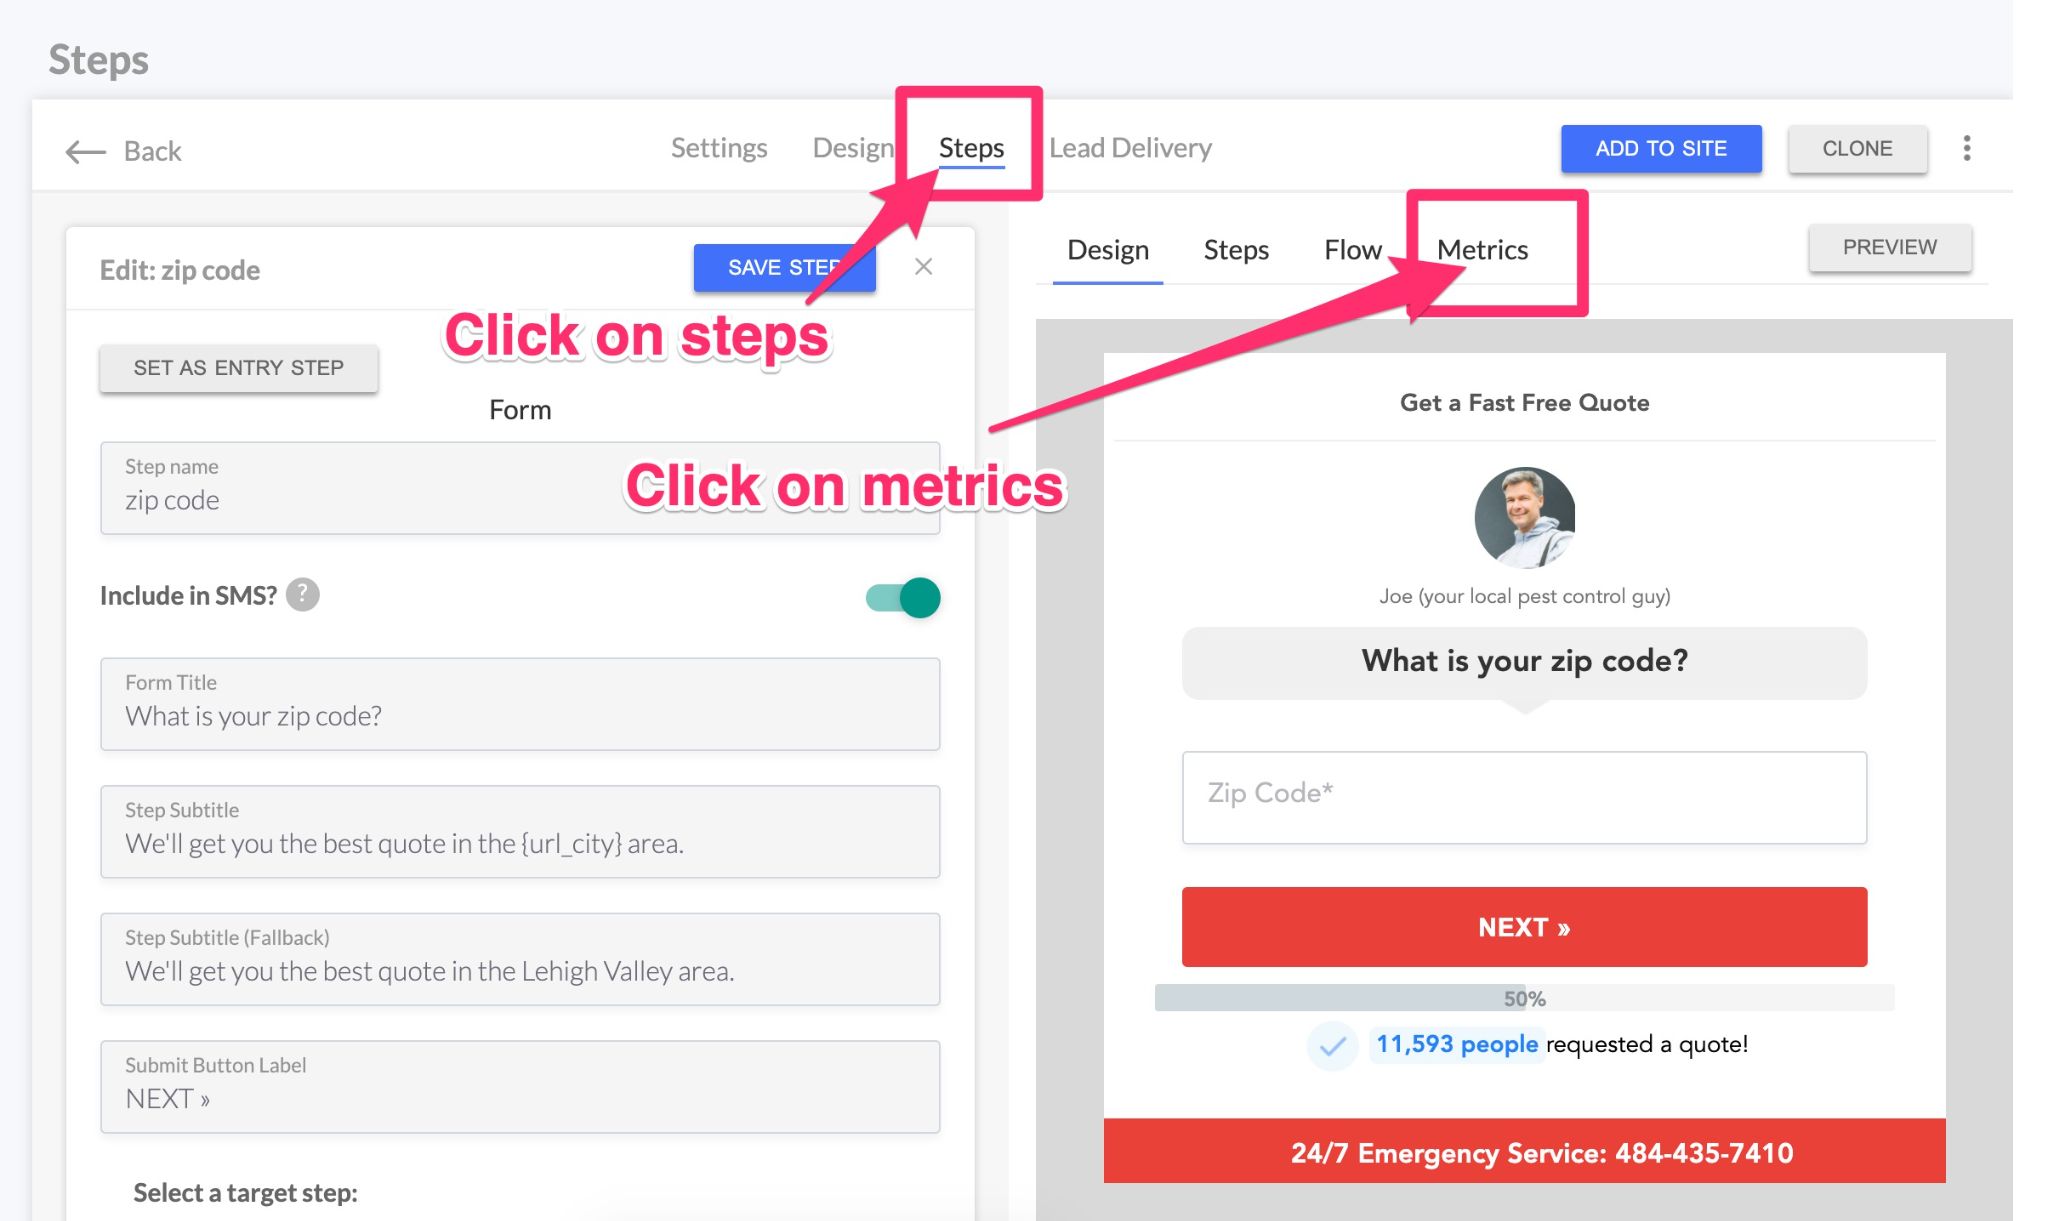
This will open up a list view of each step of your form.
If you need to sort the steps in your form, then you can simply jump over to steps and re-order the steps of the form.
Sorting your steps will not impact the flow of your form.
Next, scan down your form looking at the conversion rate of each step. Take note of the steps with the lowest conversion rate. This is usually a good starting point.
In this case, the two steps that stand out to me are:
- Step #1: Service Type: 15% conversion rate: 85% drop-off rate
- Step #4: Describe: 53% conversion rate (47% drop-off) and longer duration time

Typically the first step of the form has a lower conversion rate, especially if you’re using our pop-up feature.
So while there are plenty of optimizations to do there, it’s something that I would probably come back to.
In this case, Step #4, with a 53% conversion rate looks really interesting to me because there seems to be a sudden drop-off.
Let’s flip over to the design step and take a closer look at what this step/question looks like.
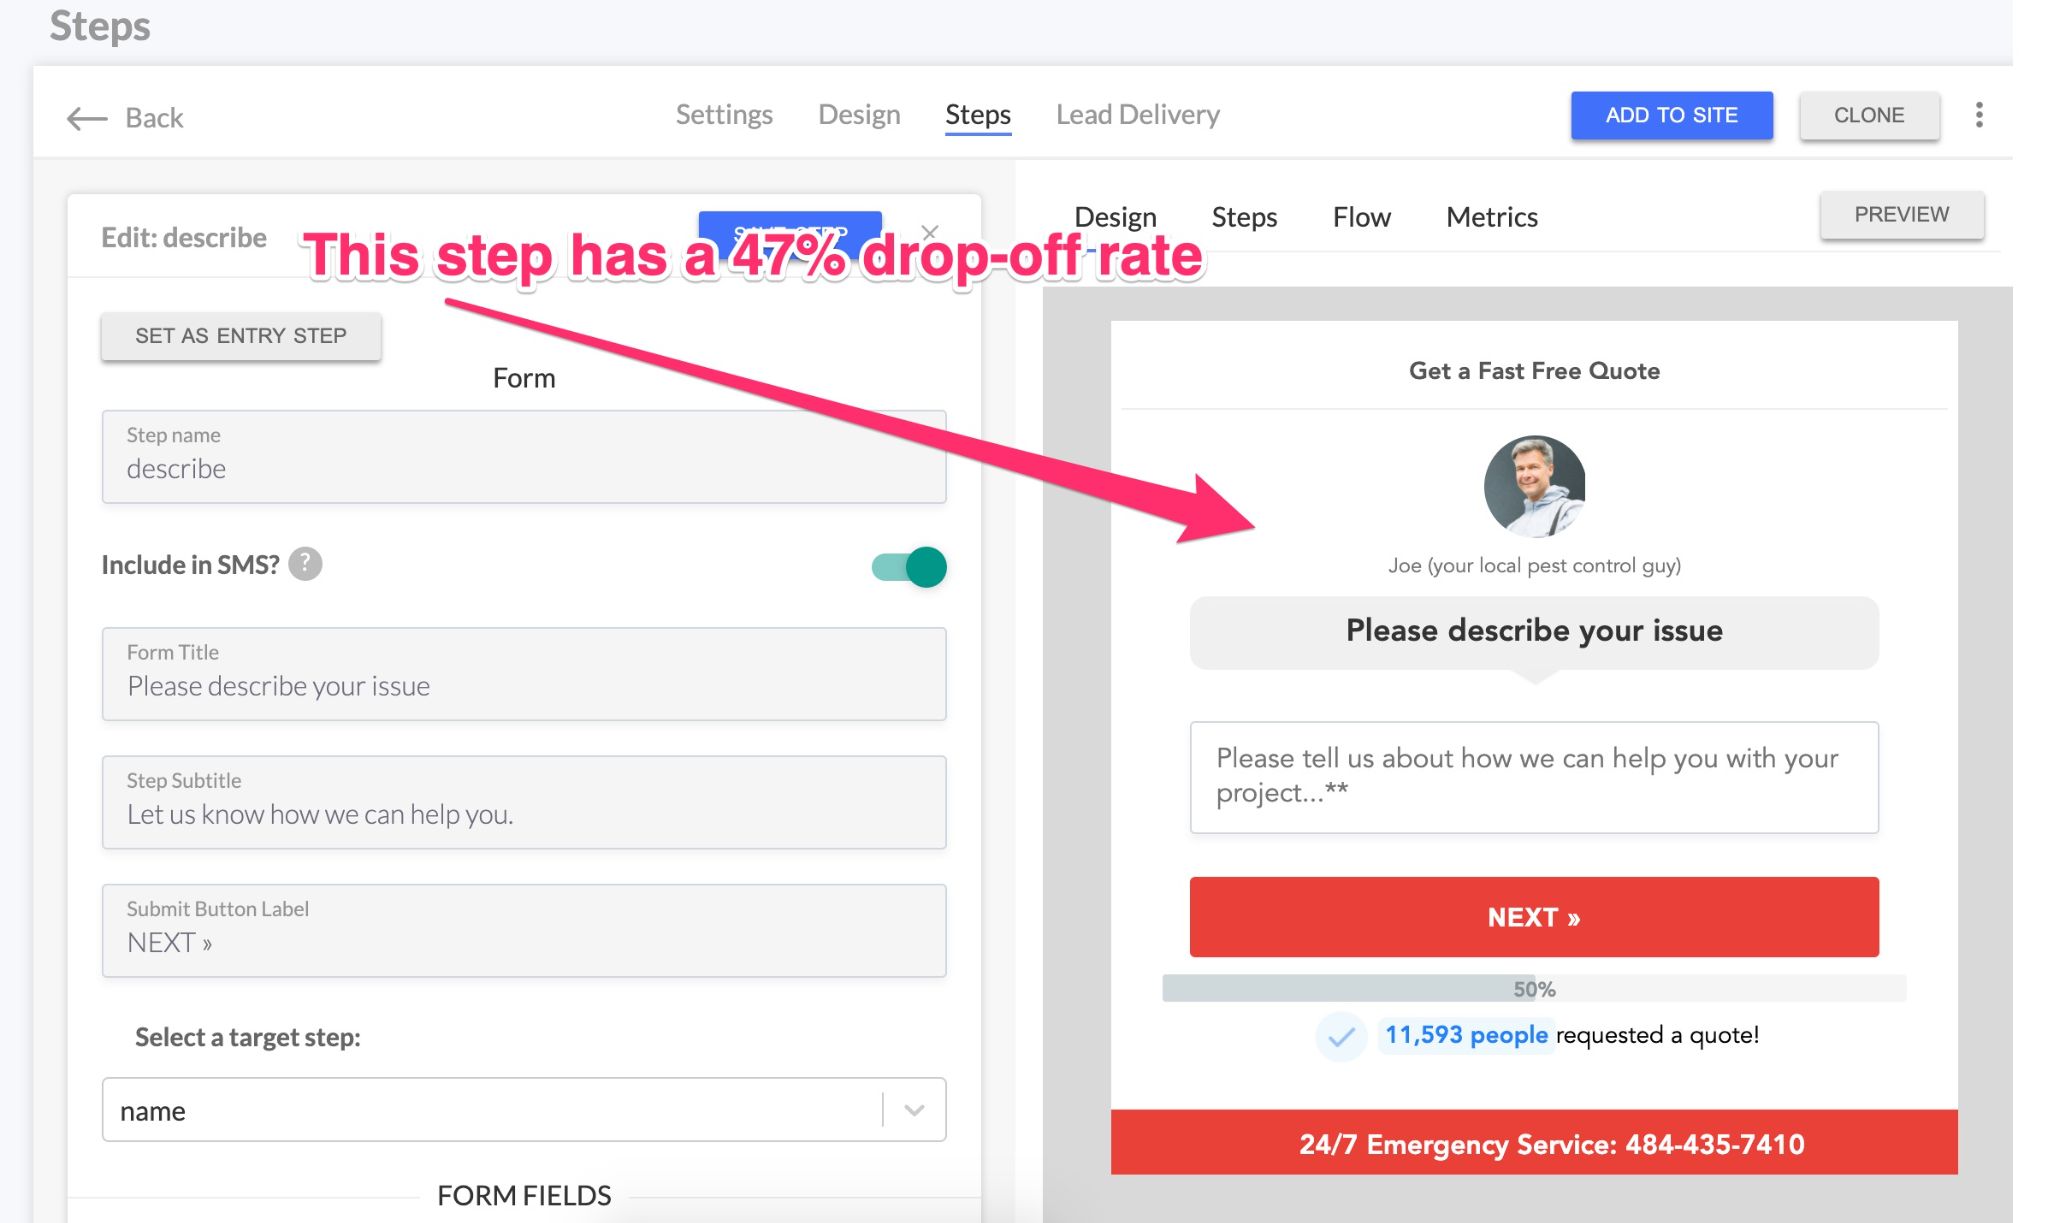
In this step, the form is asking the prospect to describe their issue, then it’s requiring them to click “NEXT” to continue.
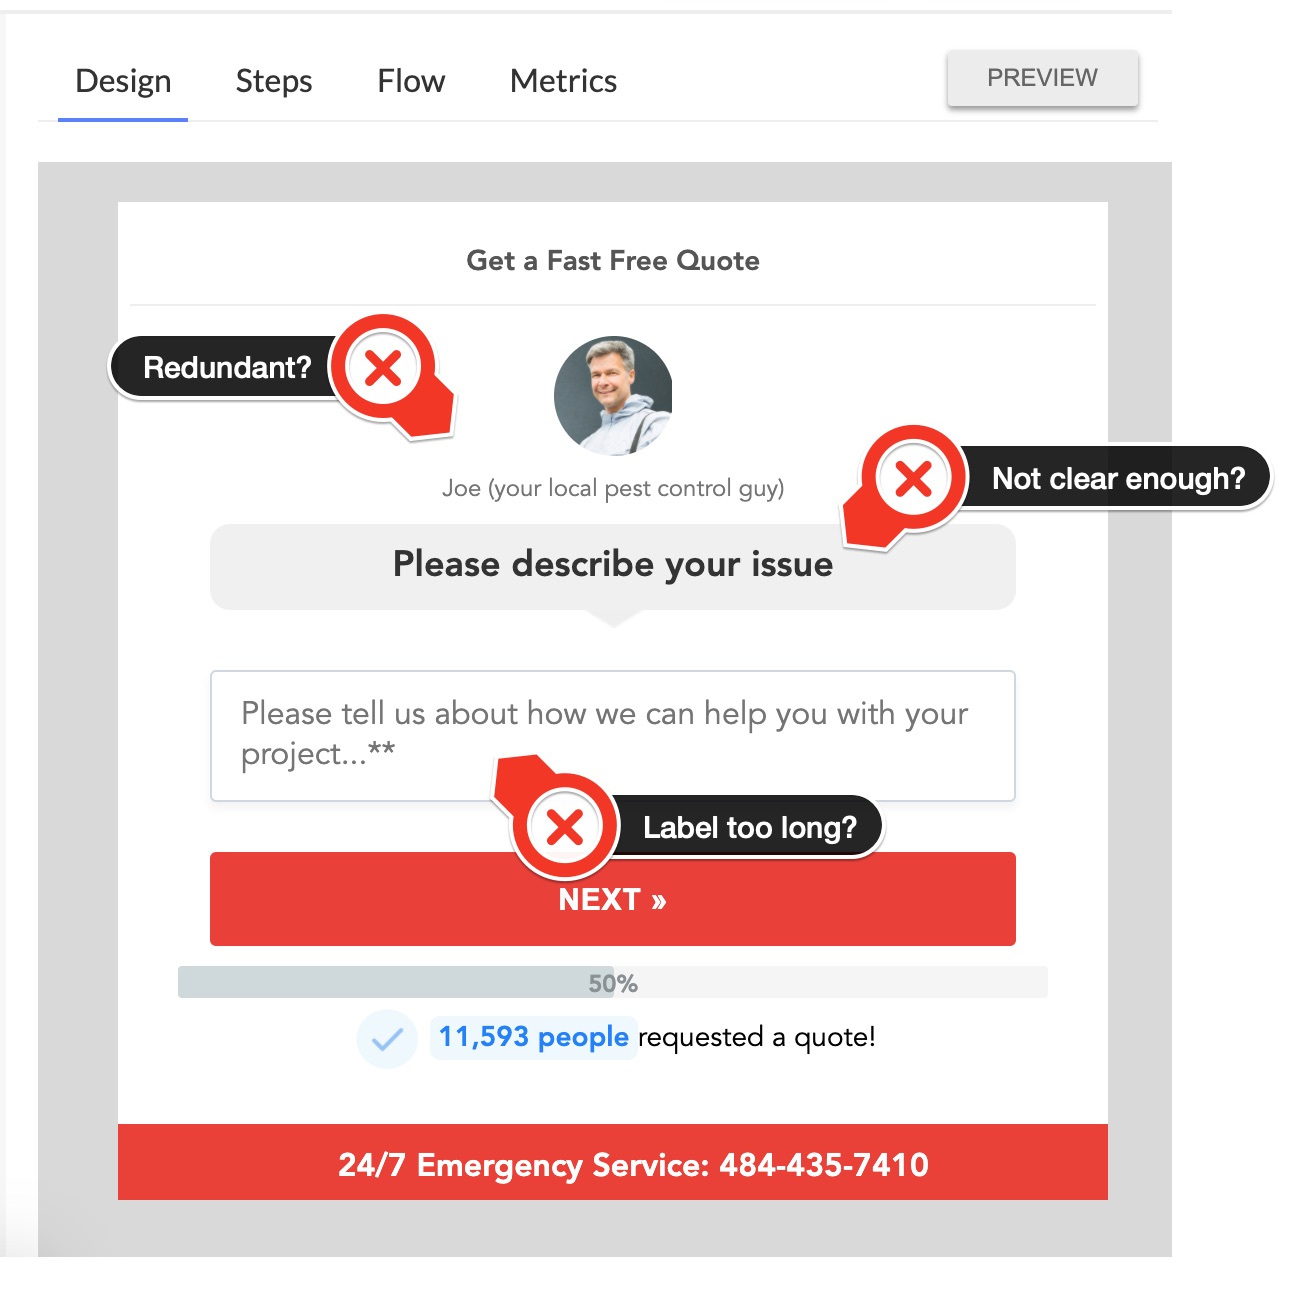
Some of my immediate thoughts are:
- Something about this question is causing people to stop and think. When people stop and think, conversions also go down
- The question feels unnecessary for this type of form, especially since I’m asking for the service type in the first question
- Or maybe there’s something that’s not clear about the copy
The bottom line is that with open-ended form fields we do tend to see a slight increase in drop-off rates.
So in this case, the optimization that I will make is to just remove this step all together from the form.
Optimizing Your Form With A/B Testing
After you identify the parts of your form that you’d like to change, I recommend starting with just one change at a time and leveraging our A/B testing feature.
Personally, I like to map out all of my tests inside of my Form Optimization Spreadsheet. You can grab your free copy here.
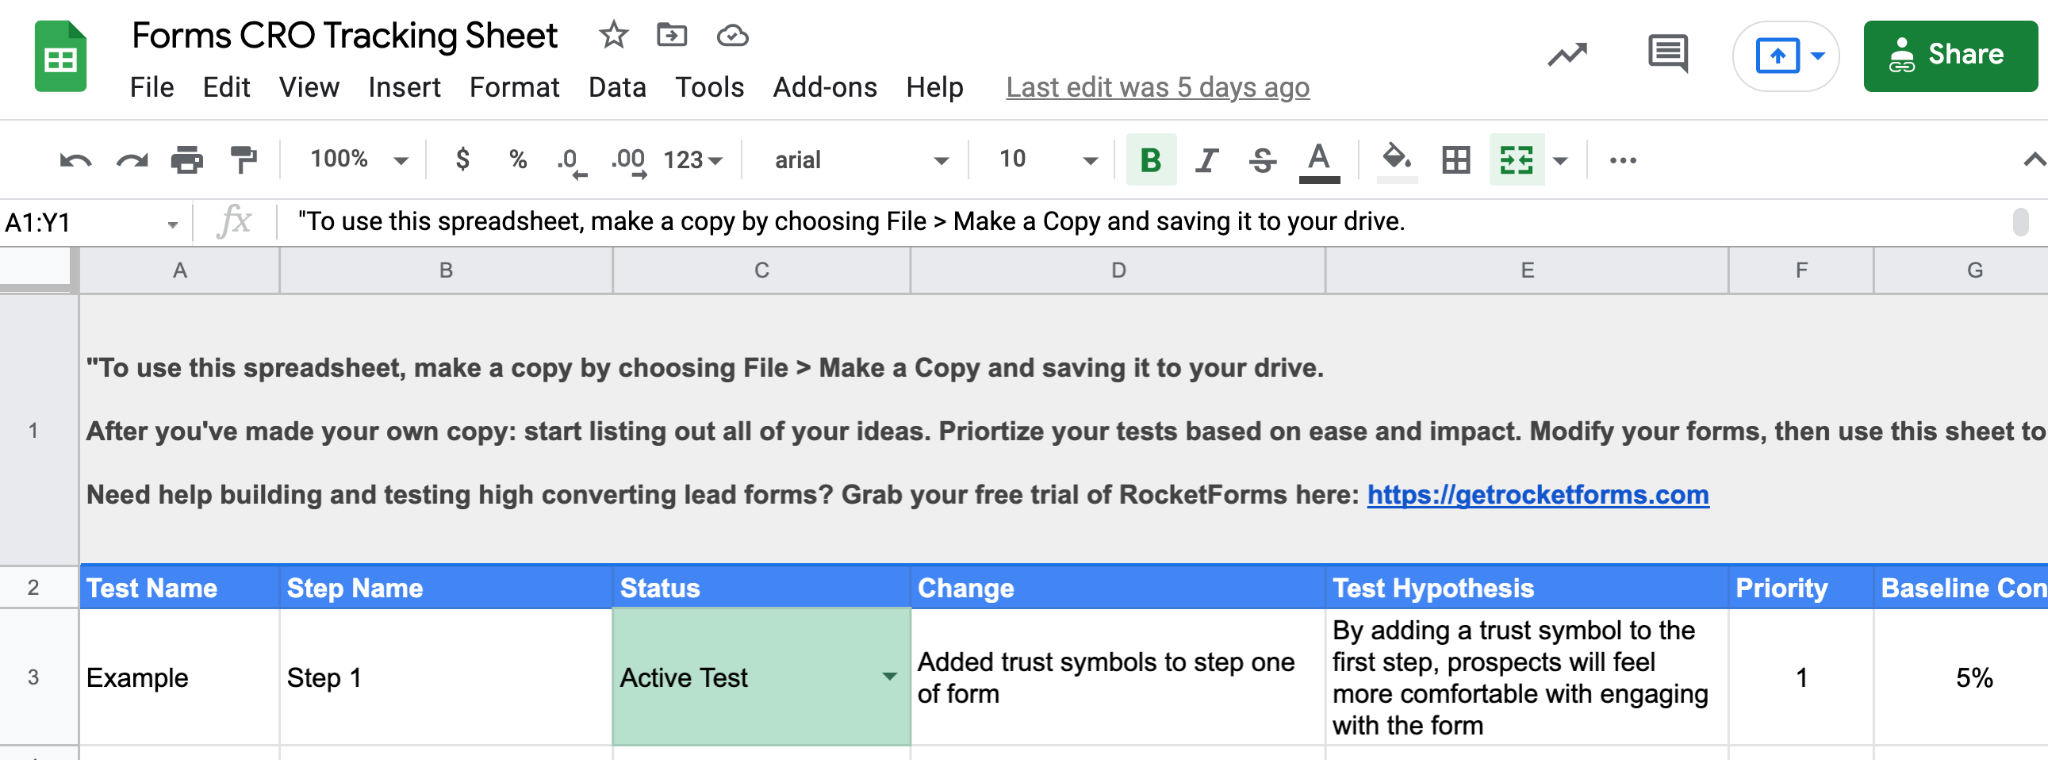
After the tests are lined up, you can jump into LeadForms and set up an A/B test.
To launch an A/B test, simply go to the form that you’re updating and click on the button called A/B test
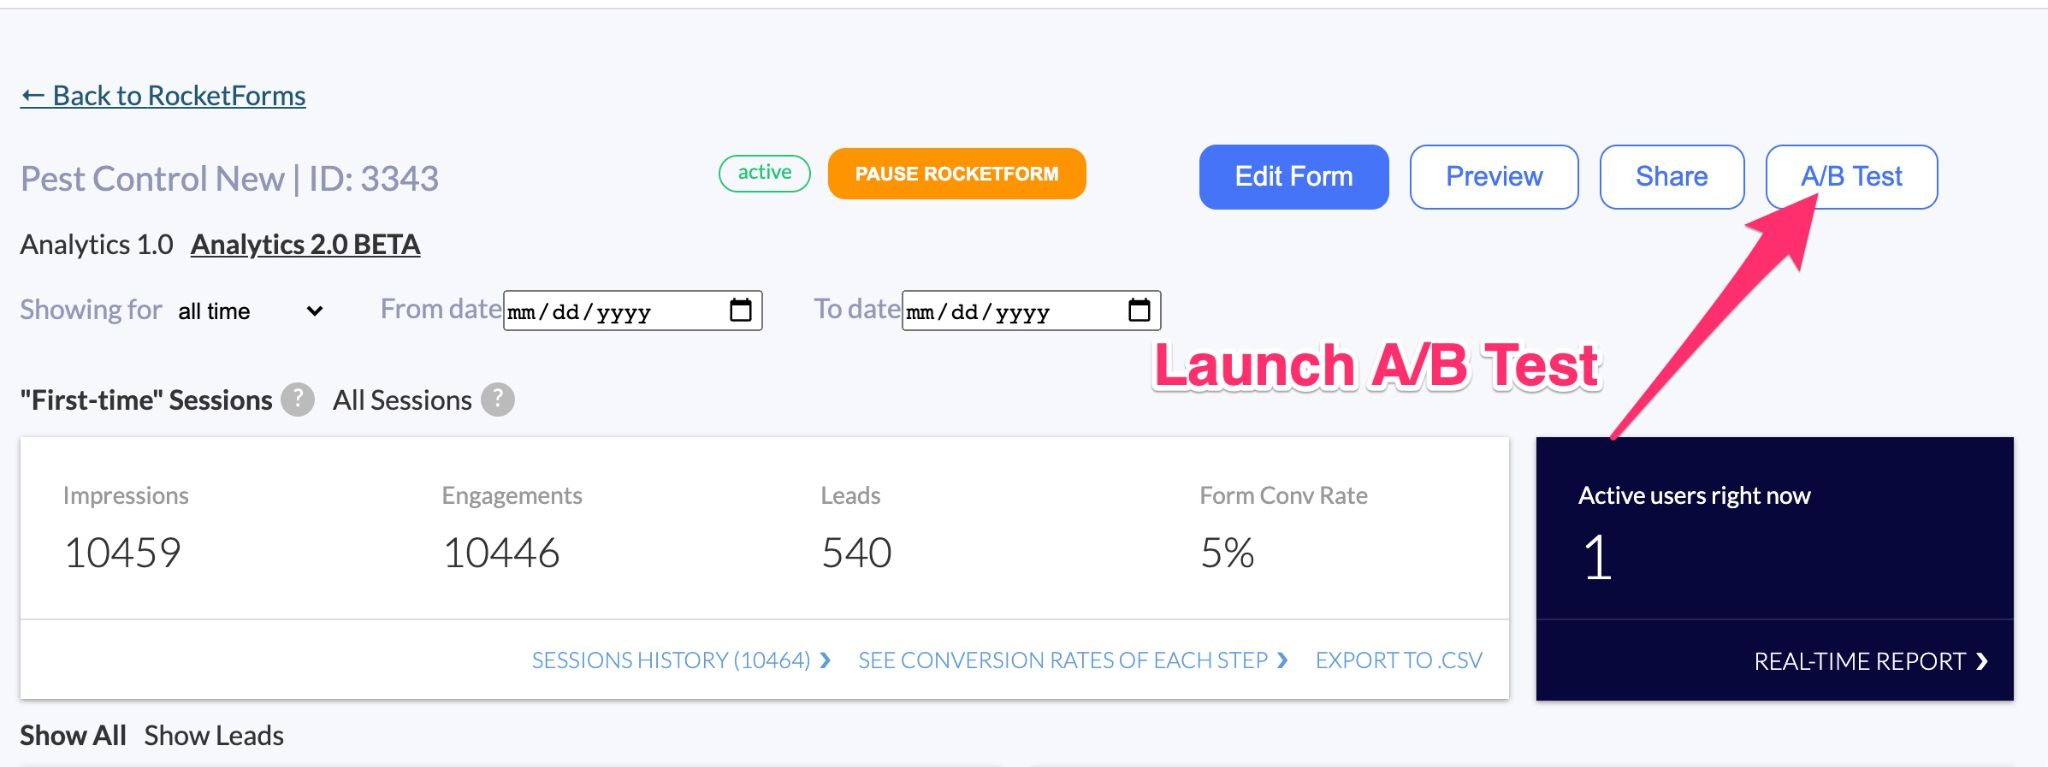
This will open up a variant form where you can make all of the changes that you need to make.
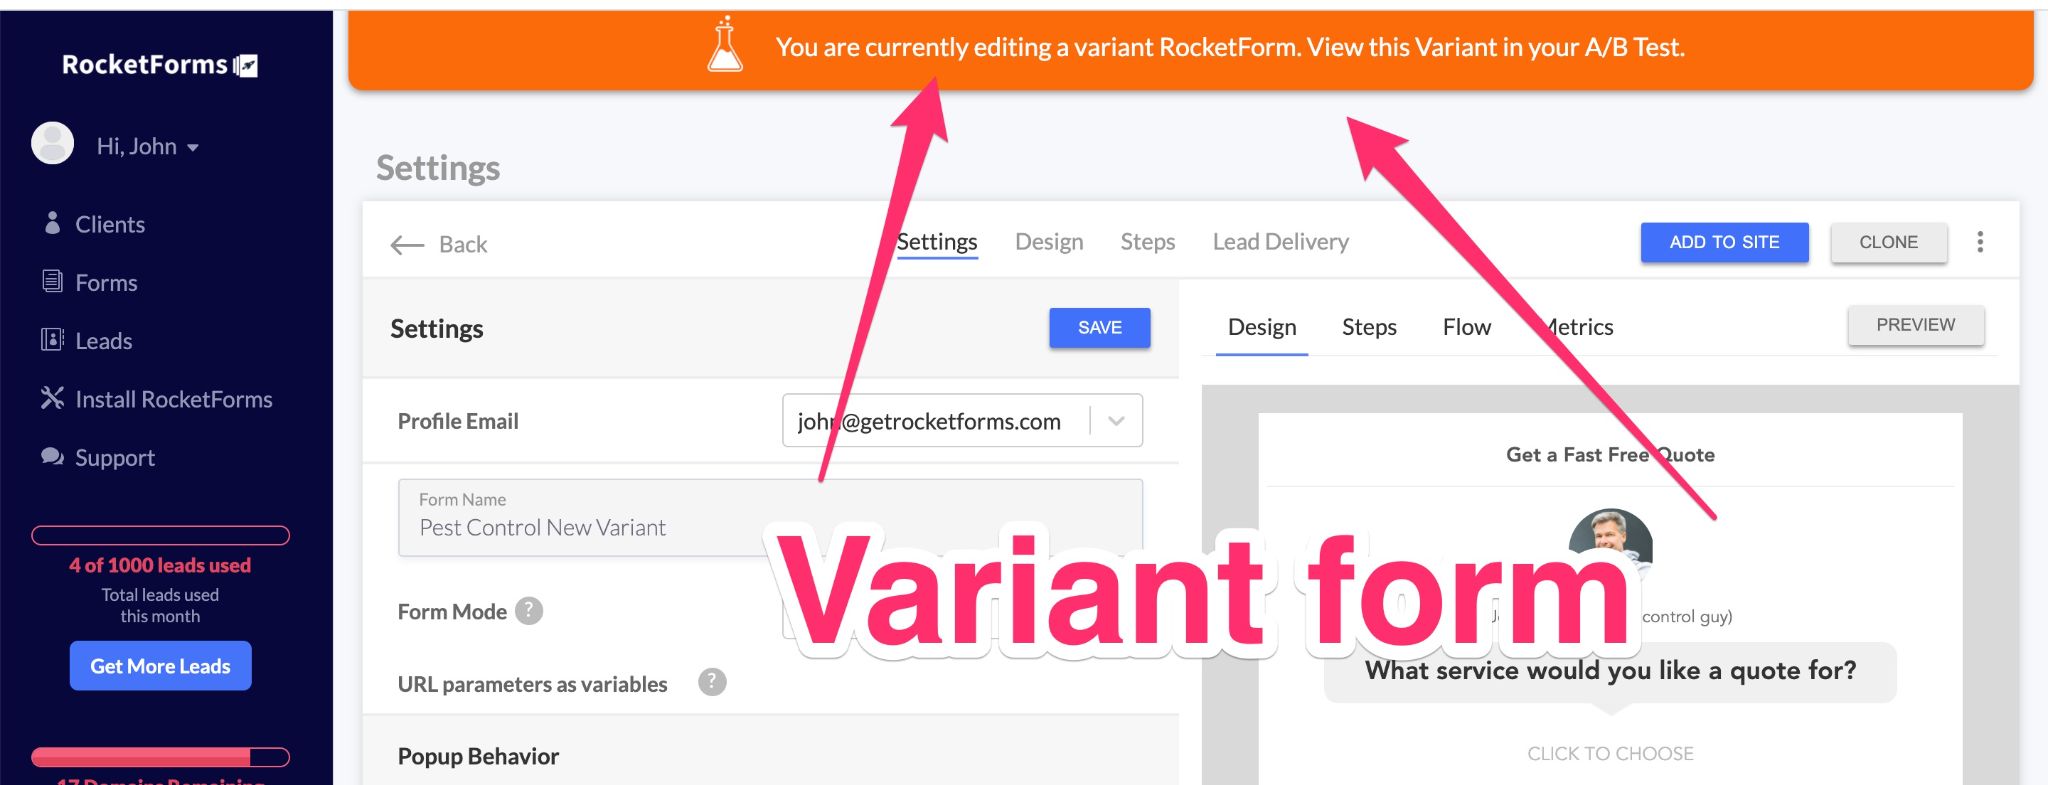
Make your changes then set your form live. You can track the performance of your A/B test right inside of LeadForms.
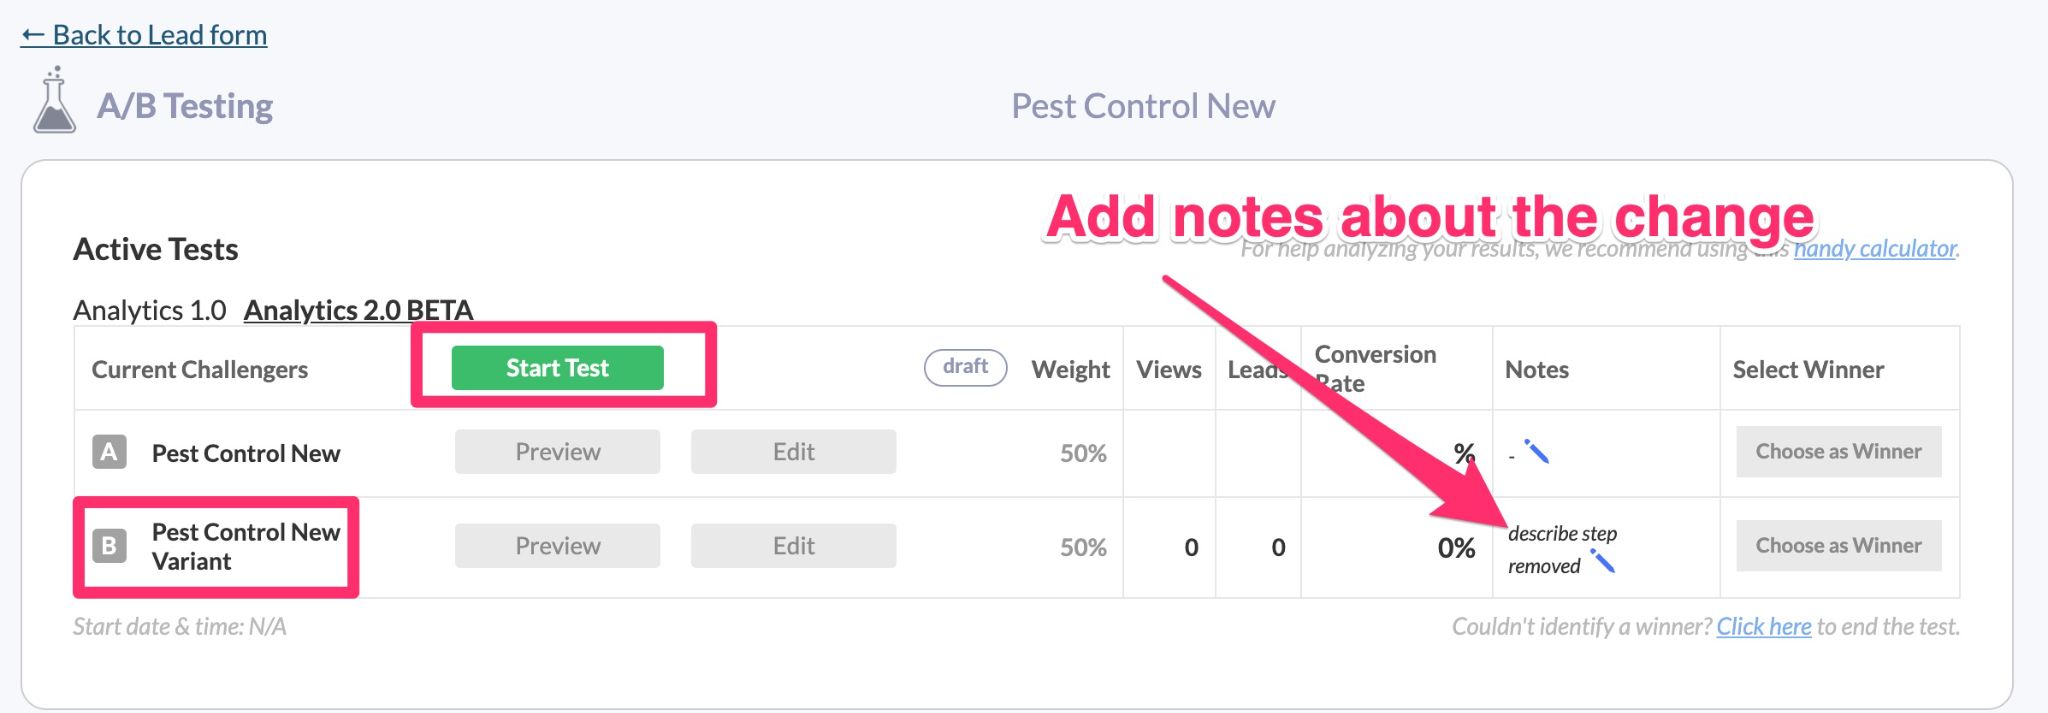
What if you don’t have enough traffic to run an A/B Test?
If you have a low traffic site then you can skip the A/B test and just make changes directly to your existing form. If you take this approach, then I suggest making notes of when you made the changes and using the date filters in the metrics view to compare metrics before and after the change was made.
Bonus: Optimization Ideas to Reduce Form Abandonment
As you start analyzing your forms, here’s a list of some simple ideas that you can implement into your forms to reduce form abandonment.
- Add trust symbols to the first step
- Remove open ended form fields
- Remove any confusing copy — try using conversion.ai for help with your copy
- Add personalization to your forms
- Carry the headline of your ads into your forms for greater ad to landing page relevance
- Optimize your CTAs so they are clear
- Try reducing or adding options
- Add teaser text to encourage people to move forward in your forms: simple nudges like “your almost there”
- Add copy to build trust around areas where you ask for sensitive information
- Test using social proof
- A/B test different design and styles
Here are some additional ideas along with some lead generation form best practices to boost your leads.
Finally, You can also ask us for help. We will review your form and provide a free analysis. No gimmicks, no hidden costs or upsells. We want to see our customers succeed, which is why we offer this service. Simply shoot us a message and we’ll get back to you with more details.
Final Thoughts
At LeadForms, we give you all the tools that you need to design the perfect form, reduce form abandonment and increase leads.
The amazing thing is that you don’t need to create the perfect form the first time around.
With step-based metrics, combined with A/B testing you can get the form out into the wild, get some data, and then make optimizations to increase leads.
Here’s what to do next:
Not using LeadForms? Sign up for a free trial or browse our templates here.
Want your forms reviewed by us? Contact us to have us review of your lead forms (note: you must be a LeadForms customer).
Finally, when you’re ready to start optimizing your forms grab our free form CRO tracker.