In this post, I’m going to show you exactly how to create a multi-step form with a progress bar, like this 👇

All without without touching any code.
Yep! Gone are the days of dealing with cross-browser compatibility issues and wrangling with complex code.
And I’m also going to fill you in on the number one mistake to avoid that could totally wreck your form’s conversion rates when using a progress bar.
Simply follow my step-by-step instructions in this post, and you’ll have a multi-step form with a progress bar up and running in no time.
Want to jump right into things? Grab our free template of a multi step form with a progress bar here.
Ready? Let’s go!
Do progress bars impact conversion rates of multi step forms? The Answer might surprise you
Before we begin with the step by step guide, let’s first address a common misconception about the impact of progress bars on conversion rates.
It’s generally thought that using a progress bar in a multi step form will improve conversion rates. Well, I’m here to tell you that’s not always the case.
Based on the data, I’ve found that using a progress bar actually has very little impact on conversion rates as a whole, as long as the progress bar is not used on the first step of the form — that’s the big mistake that can totally crush your conversion rates.
Here’s a bar graph from a recent test that highlights including progress bar on step one and its impact on conversion rate. As you can see, by removing the progress bar on the initial step, there’s an approximately 133% lift in the conversion rate.

I believe that using a progress bar on the first step may actually lower conversion rates because it influences the prospect’s level of perceived effort. This is the amount of work or effort a person believes a task will require based on the first impression.
Think of it this way, if at the onset, a form looks long as indicated by a progress bar on the initial step, then the perceived effort to complete it can dissuade a person from starting in the first place.
However, this doesn’t mean that you shouldn’t use a progress bar in your forms.
The primary benefit of incorporating a progress bar is to improve the user experience. It visually indicates to the prospect where they are in the form completion process, providing them with a sense of progress and how close they are to the finish line.
Therefore, I’d recommend setting up your progress bar to start on your second step, like in the example below.
 |
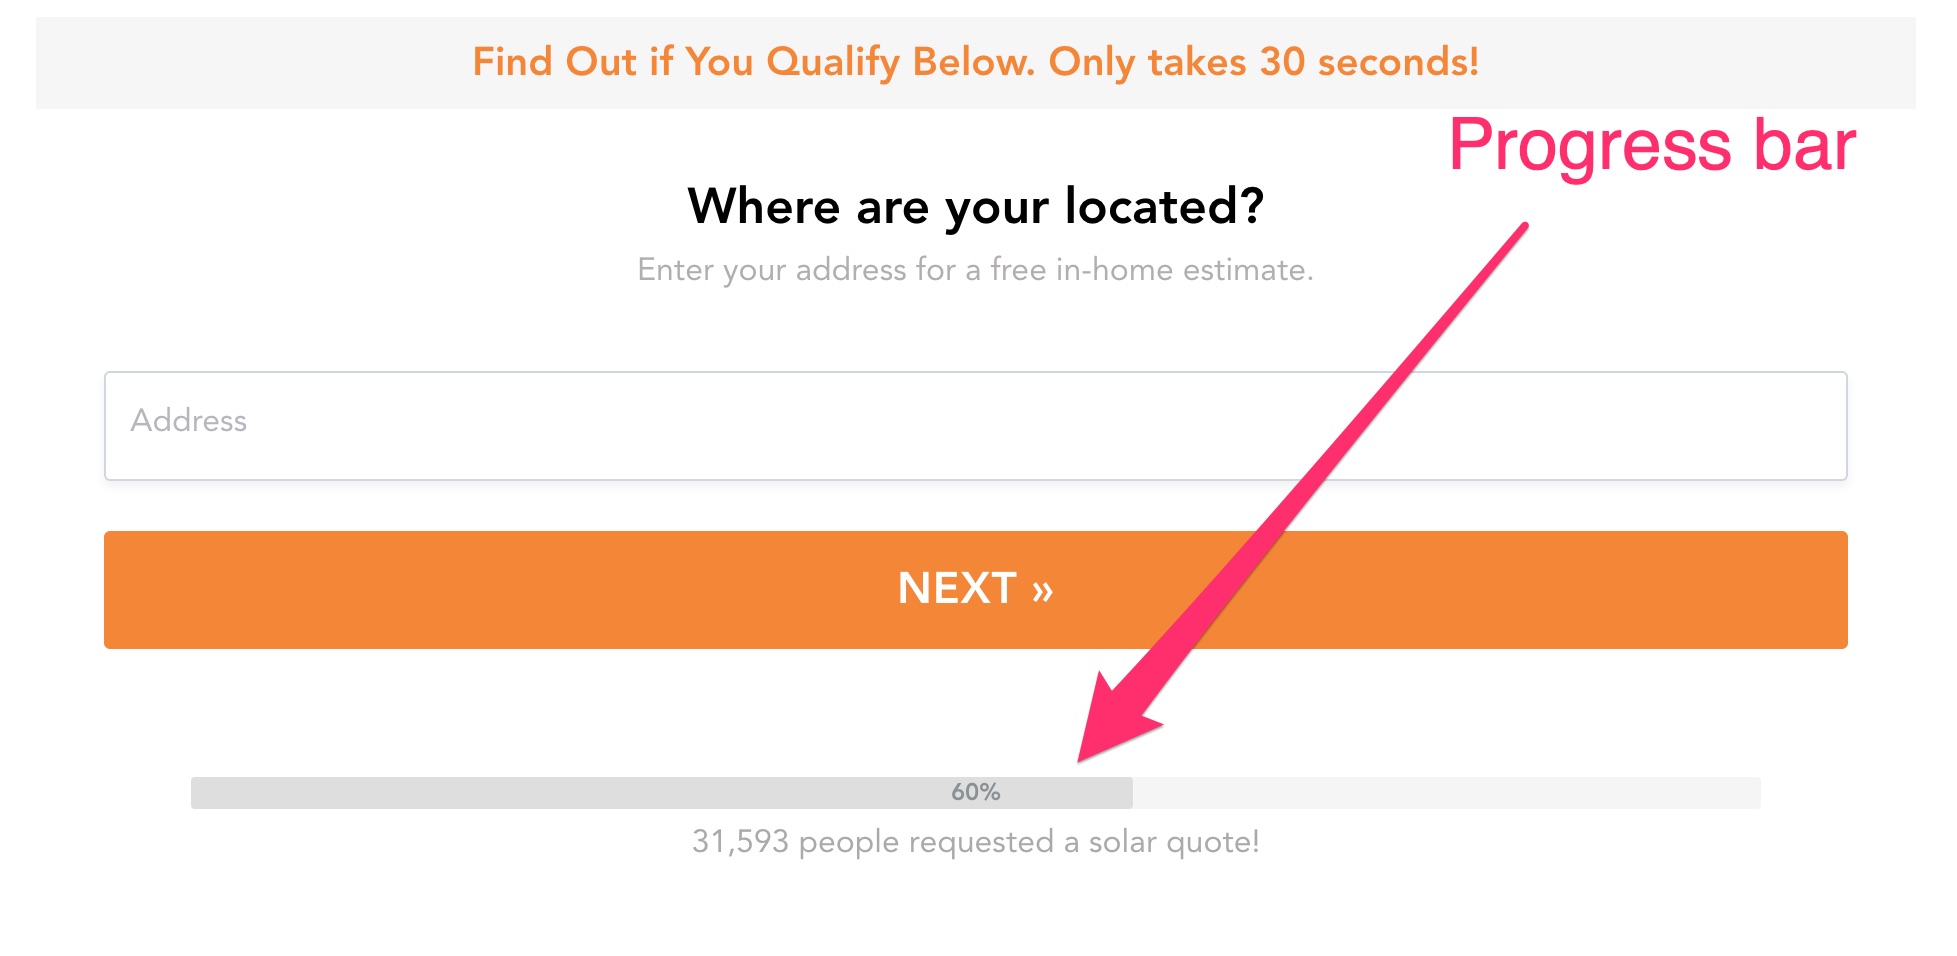 |
|---|
You can see an example of this in action here.
Now let’s jump into the actual process for implementing one of these progress bars without code.
Step 1: Start with a template
Sure, you can build a progress bar from scratch using jQuery, CSS, and HTML.
But keep in mind that this can be time-consuming and prone to issues — like cross browser compatibility problems. That’s why I recommend using a multi-step form builder like GetLeadForms.
With GetLeadForms, you can easily create a multi-step form with a progress bar in just a few clicks. To get started, simply sign up for a free trial of GetLeadForms.
Once you’re in the platform, click on the ‘Template’ section.
This is where you’ll find a variety of form templates that already include a progress bar. Pick the template that aligns with your goals.
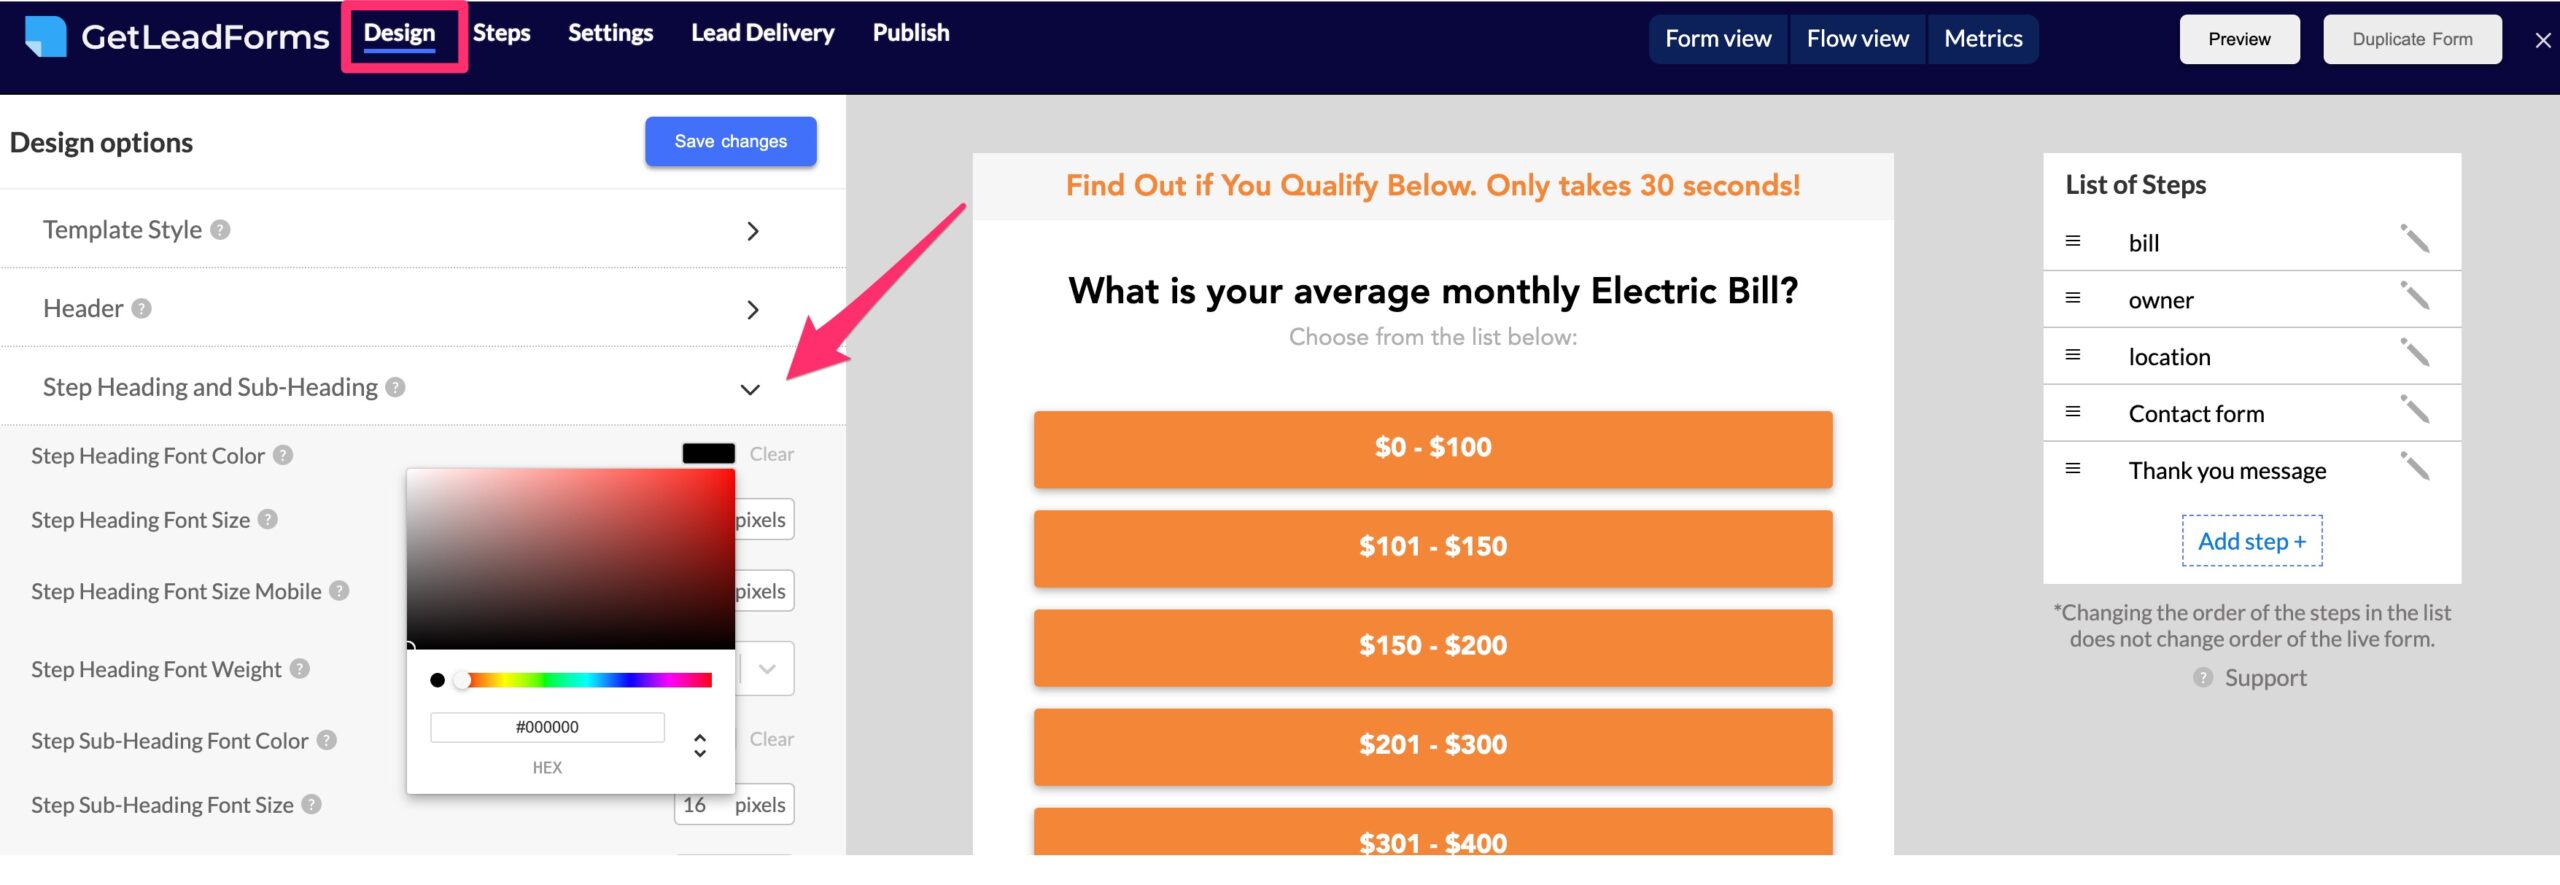
Step 2: Update your form’s design and add questions
After selecting your desired template, the next step is to update the design of your multi-step form to match your website’s branding.
Head on over to the design section where you have the flexibility to change button colors, font styles, and other visual elements. This allows you to maintain consistency with your page’s overall look and feel.
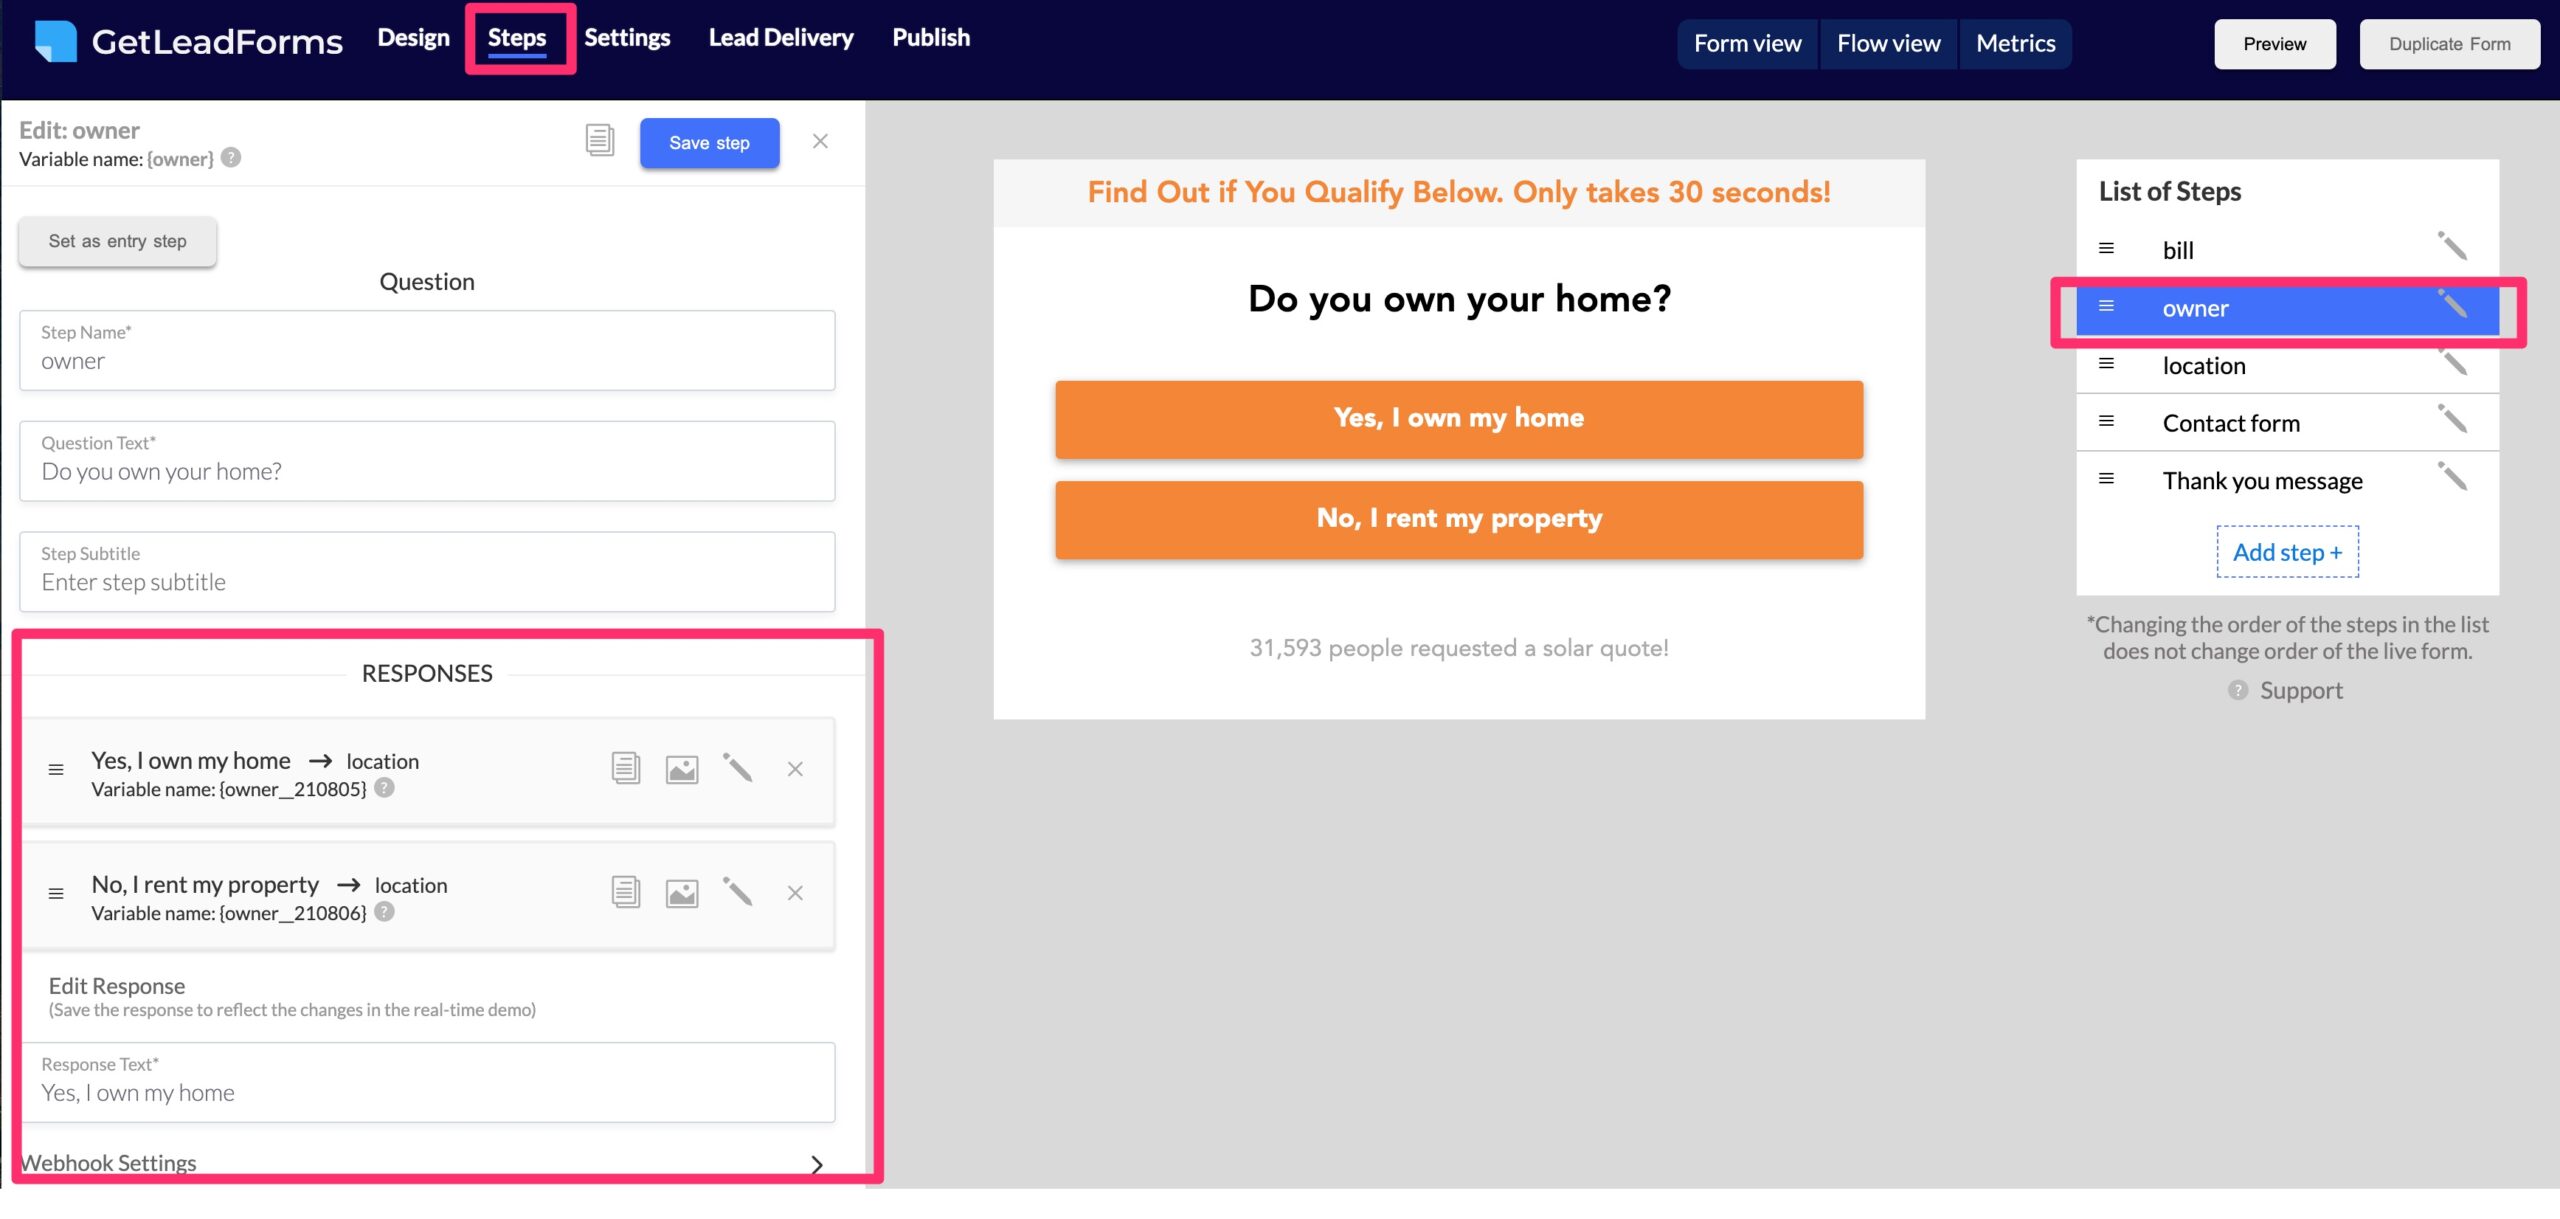
Next, it’s time to add questions to your multi-step form.
GetLeadForms provides an easy way to customize the questions and form fields according to the data that you want to collect about your leads.
With your form all setup, the final step is to add your progress bar.
Step 3: Add a multi step progress bar to your form
We aren’t going to use any code to add a progress bar to your form. Simply follow the steps below:
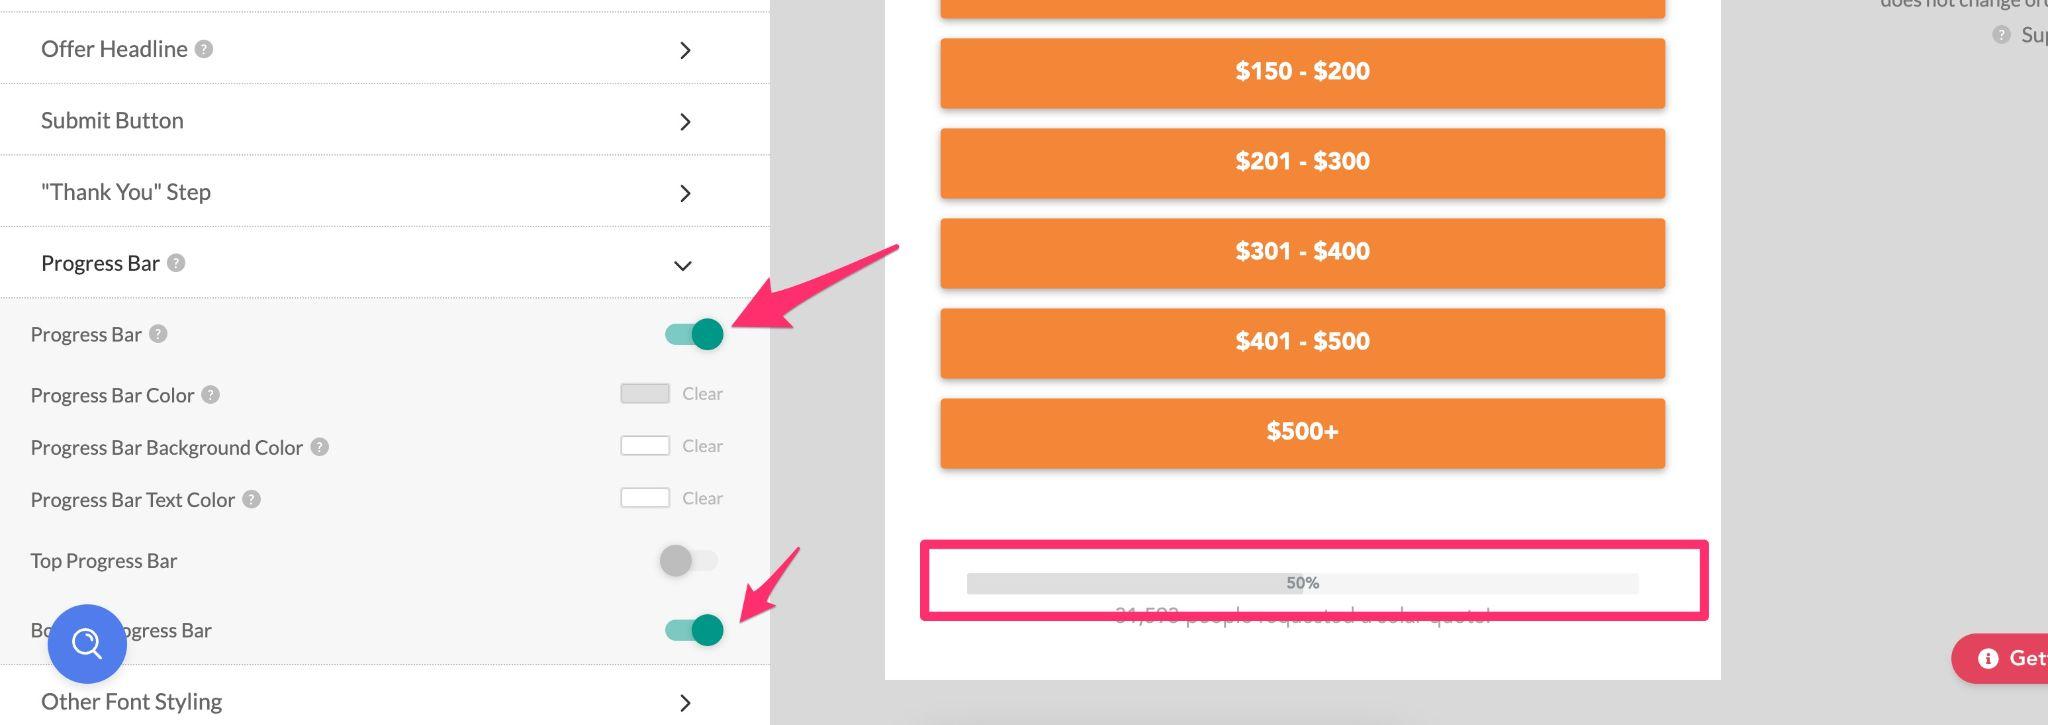
1. Go to the Design tab in the form builder. Here, you’ll find an option to expand the ‘progress bar’ section.

2. Enable either the progress bar at the top or bottom of your multi-part form. I usually recommend keeping the progress bar at the bottom of your form.
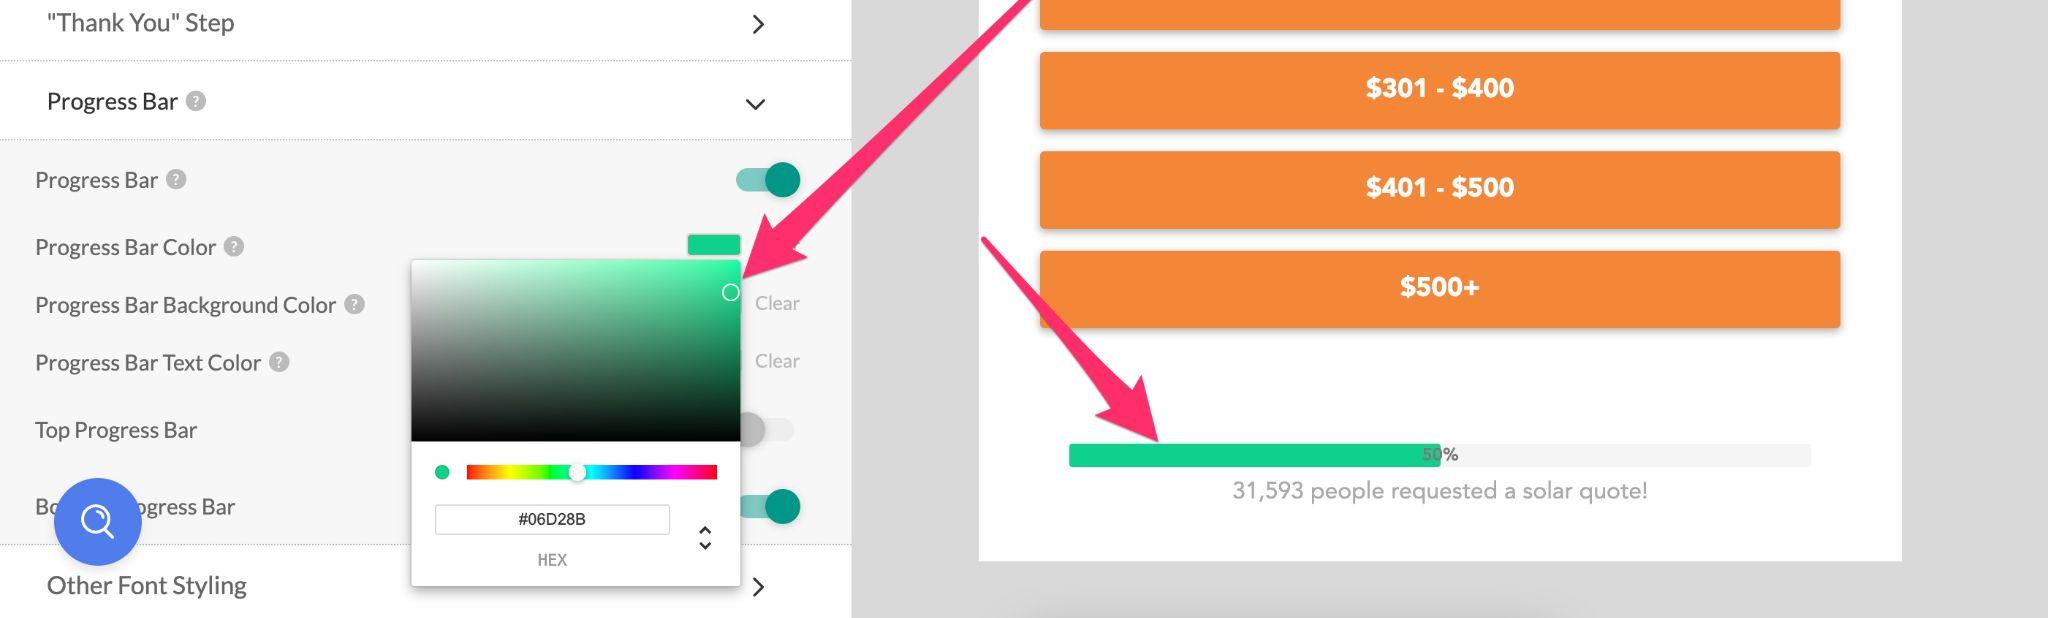
3. Finally, customize the design of your progress bar to match your landing pages’ design. You have the flexibility to choose any color you like, ensuring consistency and a visually appealing form.
4. After you’re satisfied with your progress bar settings and design, click on the preview button to see it in action. This allows you to test and fine-tune your form before publishing it.
And that’s all there is to it! Just like that, you’ve added a progress bar to your multi step form, in seconds instead of hours.
Final thoughts on building multi step forms with progress bars
While a progress bar won’t necessarily improve conversion rates, it will definitely improve the user experience of your multi step form, which is always a win.
If you need help along the way, check out our full library of pre-built multi step form templates with progress bars.